【Maya】 NETemplateでノードエディタをより便利に使いやすく!
2017/4/3
Tag: maya,NodeEditor,xml
こんにちは。開発室の高山です。
今回は前回扱ったアトリビュートエディタに引き続き、ノードエディタでのカスタマイズについて紹介しようと思います。
ノードエディタ(Node Editor)とはMayaでノードごとのコネクションを制御するのに使われるUIです。
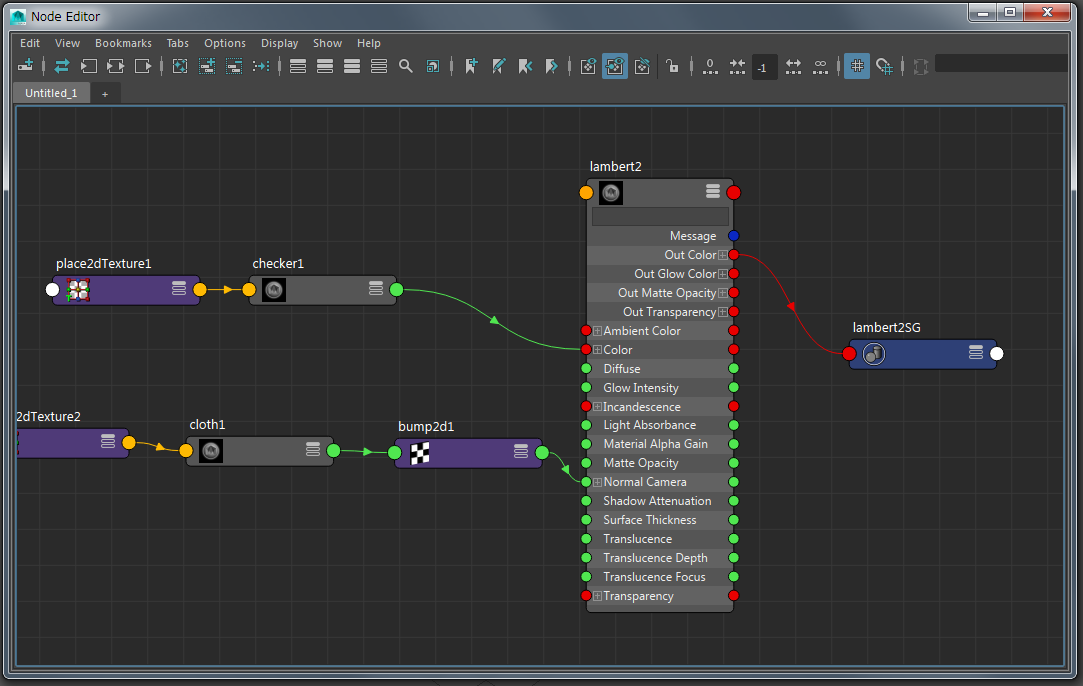
アトリビュートエディタ以上にMayaで作業する場合によく見る部分だと思います。
ノードエディタでのノードビューモードは何種類かあるのですが、どのモードも一長一短といったところで、使いにくい場合もあったり。
しかし、近年のMaya(おそらく2015以降)にはこれにカスタムモードという機能が追加され、表示するアトリビュートの種類や順番を自由にカスタムできるようになりました。
そこで今回はそれをファイルベースで実現する方法について、簡単な例で説明していきます。
MayaのUI上でカスタムを行う方法もあるので、それで十分という方は以下のURLをご参照ください。
参照URL(ノード エディタ(Node Editor)でノード アトリビュート リストをカスタマイズする):
http://help.autodesk.com/view/MAYAUL/2016/JPN/?guid=GUID-C1E02C84-8CCF-4B3D-B080-F4A379AD1FCB
ノード表示の種類
ノードエディタ上でノードの表示方法は全部で5種類あります。
- 簡易モード (simple)
- 接続モード (connect)
- フルモード (all)
- カスタムモード (custom)
- すべてのアトリビュートを表示 (Show All Attributes)
![]()
これらのモードはメニューやノードの右上にあるアイコン(上図参照)をクリックすることで切り替えることができます。
(ただしすべてのアトリビュートを表示するモードは右クリックからメニューで選ぶ必要があります)
それぞれのモードで表示させたものは以下の通り。
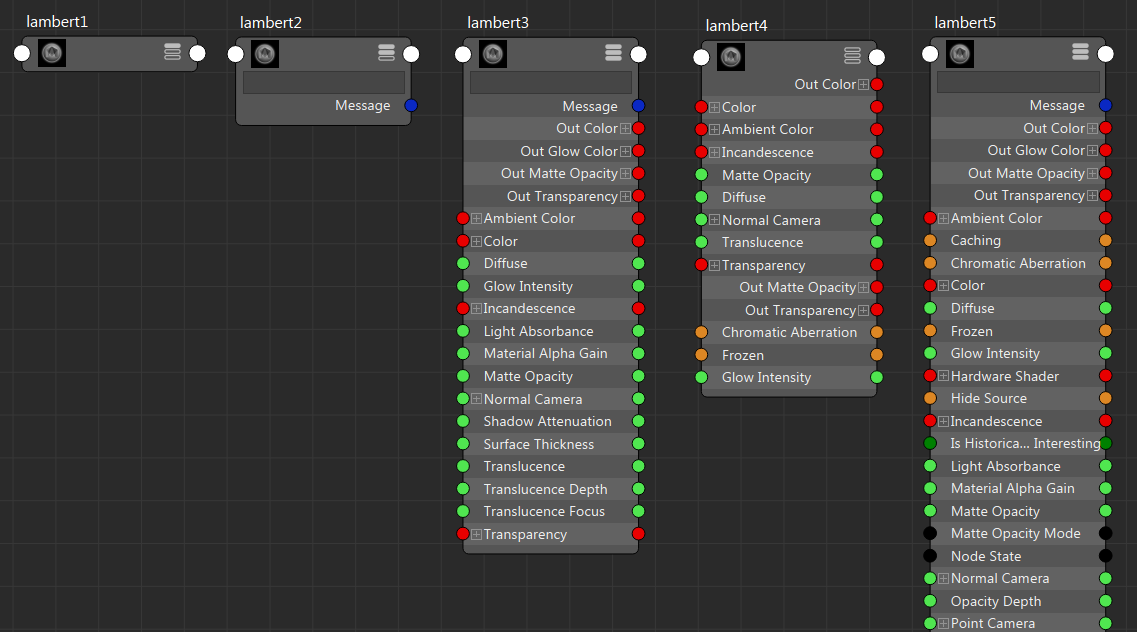
用途によって選べるのはよいのですが、それでもモードごとに表示されるアトリビュートの種類や順番が変わっているため、なかなかかゆい所に手が届かない感じがします。
今回はこれをうまくカスタマイズするために、NETemplateを使ってカスタムモードを編集する方法を紹介します。
参照URL(ノード エディタ(Node Editor) ):
http://help.autodesk.com/view/MAYAUL/2016/JPN/?guid=GUID-23277302-6665-465F-8579-9BC734228F69
NETemplateの仕組み
NETemplateファイルはノードエディタ上でのカスタム表示を記述されているファイルとなります。
xml形式で、「NE(ノードタイプ名)Template.xml」のようなファイル名となっています。
Mayaに元々入っているNETemplatesファイルは以下のようなフォルダにあります。
「~\Autodesk\Maya2016\scripts\NETemplates」
(~の部分はMayaがインストールされているフォルダ(例えばC:\Program Filesなど)になります。)
xmlでシンプルな構造なので、見ればある程度推測できるものとなっています。実際にコードをのぞいてみましょう。
以下はlambertシェーダのノードエディタ記述をしている「NElambertTemplate.xml」のコードの一部です。
※注意※
上記のNETemplatesフォルダ内にあるファイルは直接開いたり、変更したりしないでください!
UIが壊れたり、最悪Mayaが起動しなくなる恐れがあります。
開いたり変更する場合は別の影響のない場所にコピーしてから行うようにしましょう。
1 2 3 4 5 6 7 8 9 10 11 12 13 14 15 16 17 18 19 20 21 22 23 24 25 26 27 28 29 30 31 32 | <!-- NElambertTemplate.xml(一部) -->...<template name='NElambert'> <attribute name='outColor' type='maya.float3'> <label>Out Color</label> </attribute> <attribute name='color' type='maya.float3'> <label>Color</label> </attribute> <attribute name='ambientColor' type='maya.float3'> <label>Ambient Color</label> </attribute> <attribute name='incandescence' type='maya.float3'> <label>Incandescence</label> </attribute> <attribute name='matteOpacity' type='maya.float'> <label>Matte Opacity</label> </attribute> <attribute name='diffuse' type='maya.float'> <label>Diffuse</label> </attribute> <attribute name='normalCamera' type='maya.float3'> <label>Normal Camera</label> </attribute> <attribute name='translucence' type='maya.float'> <label>Translucence</label> </attribute> <attribute name='transparency' type='maya.float3'> <label>Transparency</label> </attribute></template>... |
ここ(template)では表示するアトリビュートの定義とその型、そのラベル名を指定しているようです。
例えば’color’の場合はアトリビュート名が’color’、型が’maya.float3’でそのラベル名が’Color’といった感じですね。
(ただしラベル名など値を変えても直接反映されないものもあるみたいです)
さらに以下のコードをご覧ください。
1 2 3 4 5 6 7 8 9 10 11 12 13 14 | <!-- NElambertTemplate.xml(一部) -->...<view name='NEDefault' template='NElambert'> <property name='outColor'/> <property name='color'/> <property name='ambientColor'/> <property name='incandescence'/> <property name='matteOpacity'/> <property name='diffuse'/> <property name='normalCamera'/> <property name='translucence'/> <property name='transparency'/></view>... |
ここ(view)では表示するアトリビュートの種類や順番を決めているようです。
要するにここを変更すればカスタマイズできるということですね。
ただし、templateとview両方にアトリビュートを書いていないときちんと反映されないようです。
NETemplateの改造の前に
NETemplateの改造に入る前に、その改造したいファイルを、変更が反映される場所に配置しましょう。
NETemplateの置き場所は「MAYA_CUSTOM_TEMPLATE_PATH」という環境変数で設定できるので、これに置きたいパスを追加した上でそのパスにファイルを置けば反映されるようになります。
「MAYA_SCRIPT_PATH」環境変数のパスが通っている場所に配置しても反映される場合もあるようですが、確実ではありません。
これらの場所にファイルを置いて改造することでその状態を反映でき、またここに置いたファイルだけ削除すれば元の状態に戻すこともできます。
なるべくNETemplateが元々置いてあるフォルダの方は変更しないようにしましょう。
NETemplateでカスタマイズ
では先ほど例として挙げたNElambertTemplate.xmlを使って改造していきましょう。
デフォルトでのカスタム表示だと、アトリビュートエディタとアトリビュートの順番が合っていないのが、気になりますね。
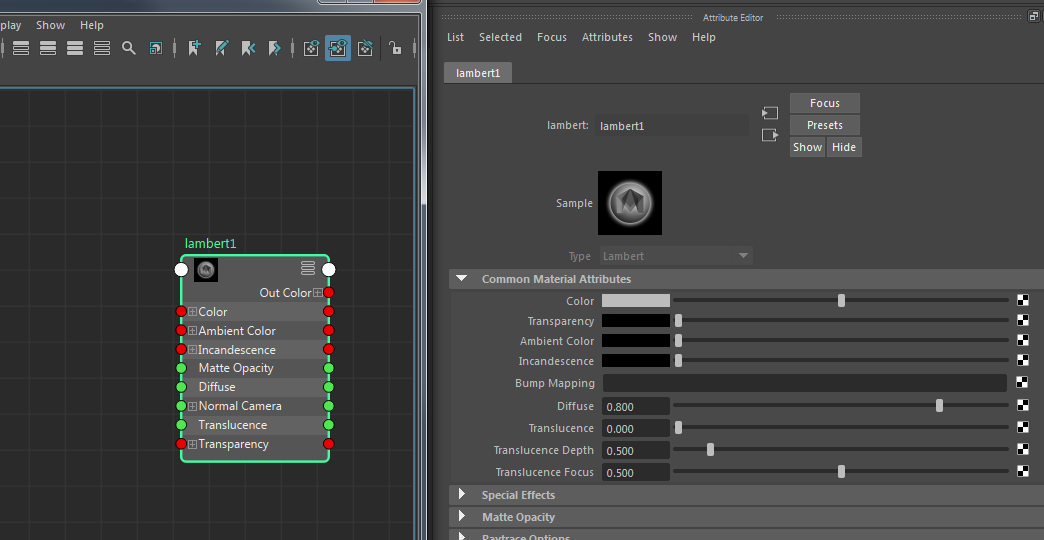
out Colorはまだしも、Common Material Attributesに入っているもの位はノードエディタの方でも表示して欲しいものです。
そこで、以下のように変えてみました。
1 2 3 4 5 6 7 8 9 10 11 12 13 14 15 16 17 18 19 20 21 22 23 24 25 26 27 28 29 30 31 32 33 34 35 36 37 38 39 40 41 42 43 44 45 46 47 | <!-- NElambertTemplate.xml(一部) -->...<template name='NElambert'> <attribute name='outColor' type='maya.float3'> <label>Out Color</label> </attribute> <attribute name='color' type='maya.float3'> <label>Color</label> </attribute> <attribute name='transparency' type='maya.float3'> <label>Transparency</label> </attribute> <attribute name='ambientColor' type='maya.float3'> <label>Ambient Color</label> </attribute> <attribute name='incandescence' type='maya.float3'> <label>Incandescence</label> </attribute> <attribute name='normalCamera' type='maya.float3'> <label>Normal Camera</label> </attribute> <attribute name='diffuse' type='maya.float'> <label>Diffuse</label> </attribute> <attribute name='translucence' type='maya.float'> <label>Translucence</label> </attribute> <attribute name='translucenceDepth' type='maya.float'> <label>Translucence Depth</label> </attribute> <attribute name='translucenceFocus' type='maya.float'> <label>Translucence Focus</label> </attribute></template><view name='NEDefault' template='NElambert'> <property name='outColor'/> <property name='color'/> <property name='transparency'/> <property name='ambientColor'/> <property name='incandescence'/> <property name='normalCamera'/> <property name='diffuse'/> <property name='translucence'/> <property name='translucenceDepth'/> <property name='translucenceFocus'/></view>... |
templateの方まで順番を合わせる必要はなさそうですが、一応view上の順番と同じにしています。
この変更を行い、表示した結果は以下のようになります。
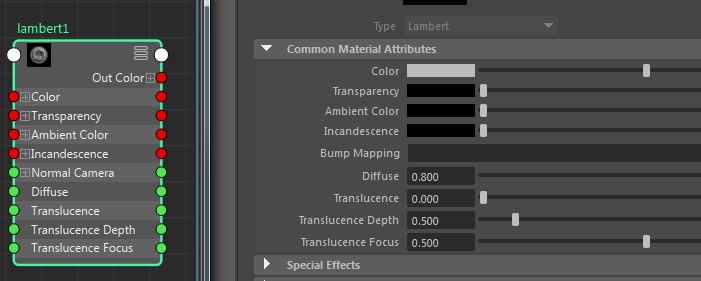
アトリビュートエディタとアトリビュートの順番をあわせることができました!
個人的にはコチラの方がすっきりとしている印象があります。
新しくNETemplateを作る
Mayaの基本的なノードに関してはNETemplateが用意されているのですが、一部(ライト等)用意されていないノードもあります。
そこでdirectionalLightを例にとってNETemplateを作ってみましょう。
基本的には先ほどと同じで、「NE(ノードタイプ名)Template.xml」を作って指定の場所に配置するだけです。
1 2 3 4 5 6 7 8 9 10 11 12 13 14 15 16 17 18 19 20 21 22 23 24 25 26 27 28 29 30 31 32 33 34 35 36 37 38 39 40 | <!-- NEdirectionalLightTemplate.xml --><?xml version='1.0' encoding='UTF-8'?><templates> <using package='maya'/> <template name='NEdirectionalLight'> <attribute name='color' type='maya.float3'> <label>Color</label> </attribute> <attribute name='intensity' type='maya.float'> <label>Intensity</label> </attribute> <attribute name='shadowColor' type='maya.float3'> <label>Shadow Color</label> </attribute> <attribute name='useRayTraceShadows' type='maya.bool'> <label>Use Ray Trace Shadows</label> </attribute> <attribute name='useDepthMapShadows' type='maya.bool'> <label>Use Depth Map Shadows</label> </attribute> <attribute name='emitDiffuse' type='maya.bool'> <label>Emit Diffuse</label> </attribute> <attribute name='emitSpecular' type='maya.bool'> <label>Emit Specular</label> </attribute> </template> <view name='NEDefault' template='NEdirectionalLight'> <property name='color'/> <property name='intensity'/> <property name='shadowColor'/> <property name='useRayTraceShadows'/> <property name='useDepthMapShadows'/> <property name='emitDiffuse'/> <property name='emitSpecular'/> </view> <view name='NEDefaultSoloOutput' template='NEdirectionalLight'> <property name='outColor'/> </view></templates> |
これでノードエディタ上に表示させた結果は以下の通りです。
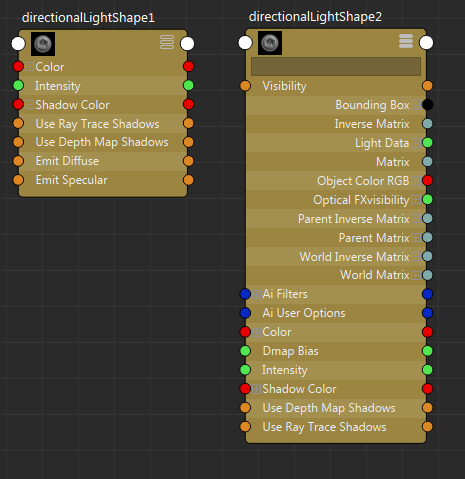
右のフルモードと比べて、今回作成したカスタムモードでは大分シンプルにできました!もちろん好みに合わせてアトリビュートの追加・削除を行ってもよいでしょう。
まとめ
Mayaのノードエディタのノードビューの仕様やカスタム方法について簡単ではありますが説明しました。
今回は既存のノードのNETemplateを作る話でしたが、プラグインなど自前で新しくノードを作る際にNETemplateもついでに作っておくとさらに便利になるでしょう。
自前で作ったNETemplateの配置場所に環境変数(MAYA_CUSTOM_TEMPLATE_PATH)さえ通っていれば、他に設定の必要なく自動的に認識してくれます。
自分好みにノードエディタをカスタムして、さらに快適なmayaライフを送りましょう!
※免責事項※
本記事内で公開している全ての手法の有用性、安全性について、当方は一切の保証を与えるものではありません。
これらの手法を使用したことによって引き起こる直接的、間接的な損害に対し、当方は一切責任を負うものではありません。
自己責任でご活用ください。
コメント
コメントフォーム