[Houdini]Hqueue Distributed Simulations
2014/3/10
Tag: distribute,Houdini,hqueure,simulation
Hello Everyone, This is Prashant, I came from India. I’m Writing first time on DF talk.
Before starting the Article i want to introduce my self to the DF talk Blog.
I started my professional career in CG industry 9 years back,in 2005.
Before Joining Digital Frontier Inc, I was working at DreamWorks Dedicated Unit, Bangalore, India for four years as Technical Director (2008 – 2012). Some of the projects Some of the Projects I worked on here are Madagascar 3: Europe’s Most Wanted (2012), Puss in Boots (2011), Scared Shrekless (2010), Merry Madagascar (2009) Dragons Riders of Berk, (Television)
Before DreamWorks, I was working at Prana Studios, Mumbai, India, where I worked for one year as FX TD.
I enjoy problem solving, experimenting with Houdini to implement different tools/features and find the idea for mimicking natural phenomena in CG. My areas of interest are volumetric effects and techniques, Dynamics and Particle Simulation (Houdini and Maya), Procedural Setups in Houdini, Research and Development.
This Article is about some of the ways to do distributed simulation in houdini.
HQUEUE is a distributed job scheduling system.
http://www.sidefx.com/docs/hqueue12.0/help/
I tried collecting the informations based on the test i did, there might be more ways to do the distribution. I hope the article will be helpful and give some insight on the topic.
Distributed Simulation
There are mainly two ways of distributing the simulation in Houdini.
1. Distributing one frame per machine.
2. Distributing one frame of simulation on Multiple machine.
Distribution of the simulation is done using slicing, that is partitioning the effect into slices and then each slice is solved on a separate machine.
The slicing is done in different ways:-
1. Grid Based Simulation are distributed by slicing up the volume into equal size sub volumes.
2. Particle Based Simulation (particle Fluids), Cloth and Wire Simulation are sliced manually using cutting planes.
Other way of Distribution is using Clustered fluid Simulation for smoke and pyro simulation. Clustering partitions a large or sparsely-distributed smoke or pyro simulation into multiple fluid boxes instead of one giant box. This works well and output volumes blend visually. Can be distributed to multiple processes and/or machines on a farm.
Setting up Slicing
Steps of Slicing for Particle fluid simulation
1. Select the flip-fluid object inside AutoDopNetwork and click on one of the slicing tools found in the Particle Fluids Shelf shown in the image below. This will divide the particle fluid simulation.

Slice by Plane Node is added after flipfluidobject node inside the AutoDopNetwork, Please check the below image for the change in the Network.
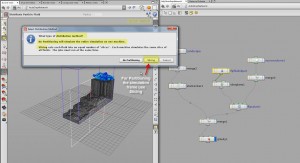
2. After slicing is done, the next step is to choose the distribution method, for that click on the Distribute Particle Fluid Tool in Particle Fluid Shelf, It will ask to select the particle fluid or fluids to distribute.

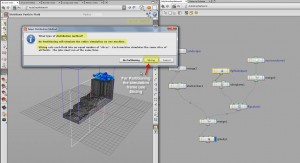
3. A GUI will popup for Selecting Distribution Method.
If you specify no partitioning, it will simulate the entire simulation on one machine.
Slicing will partition the fluid into slices. As we are setting up slicing, please click on the Slicing Button.
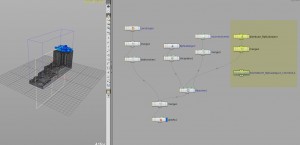
4. Step3 added few nodes in the network, These are the nodes added to the AutoDopNetwork, Distribute_flipfluidobject and Distribute_flipfluidobject_Controls, Please check the below image.
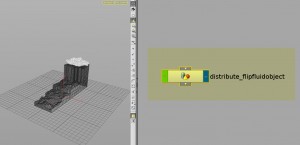
5. Step3 added distribute_flipfluidobject node at the Obj Network
6. Step3 added a render node in /out Network, distributedsim HQueue Simulation render node in /out Network to render the simulation with Hqueue.
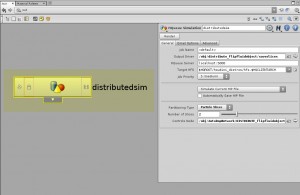
Select the distributesim node and go to the parameters pane. Write a job name in Job Name parameter text box. Leave the output drivers to their default value. Change the HQueue Server name to your HQueue server name. Change HFS path if $HQROOT is not pointing to the shared houdini installation path. Next is to select the hip file you want to simulate, You can choose from the drop down menu which has three option that is Simulate Current HIP file,Simulate Target HIP File, or Copy Project Files to Shared Folder and Simulate.
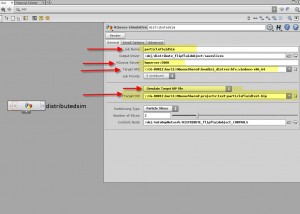
7. The image below shows the settings which I have changed. I’m using Target hip file instead of simulating the current HIP file, Also I have given an absolute path in the Target HFS parameter. Please check the below image.
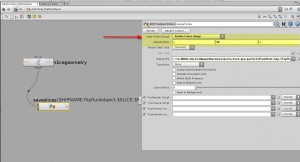
8. At the obj Network, change the Simulation frame range here in distribute_flipfluidobject Slicegeometry node.
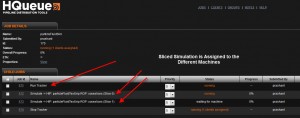
9. Launch the Render by using render button on distributedsim node, The job will appear on Hqueue Server.
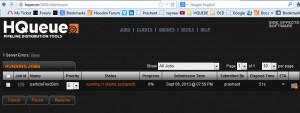
10. The Sliced simulation is assigned to different machines.
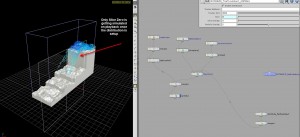
11. Please note, once the step3 is done, the slicing is set up in your scene file. If you try playback of the Simulation.
The scene view will show only one slice of the Simulation.
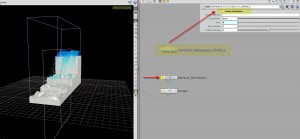
12. If you want to check the simulation without slicing after distribution (without simulation done on farm), Turn off Enable Distribution in DISTRIBUTE_flipfluidobject_CONTROLS and Bypass distribute_flipfluidobject.
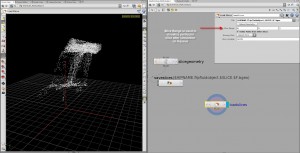
13. After the distributed simulation has finished on Hqueue. The loadslices node inside the distribute_flipfluid object, will load the finished sliced simulation from the Hqueue Farm.
Setting up Distributed Clustered Simulation
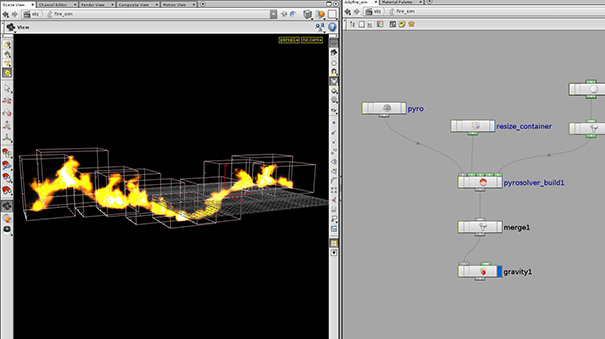
1. Create a clustered smoke or pyro simulation using Pyro FX shelf’s Pyro Cluster or Smoke Cluster tools. The below image shows the clustered fire simulation which I’m using to show distribution.
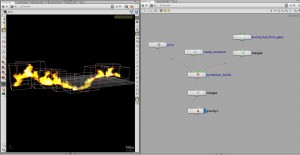
2. To create a distributed clustered fluid simulation, select the Distribute Container tool from Container Tools Shelf. Please check the next image .

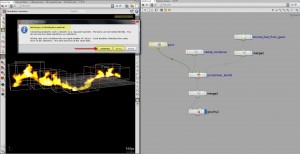
3. The tool will ask you to select the container to distribute. Please select the fluid container inside the AutoDopNetwork, The tool will then ask for the distribution method. The dialog box will briefly explain the difference between slicing and clustering. Because we are setting up distribution for clustered fluid object, please select Clustering.
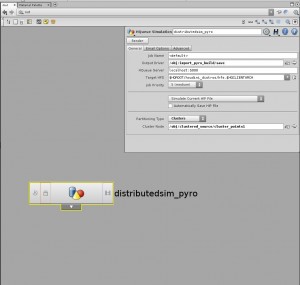
4. The tool will create a Hqueue Simulation node in out Context, This is the same node created while setting up the sliced simulation. All the parameters are the same.
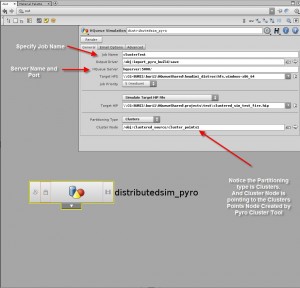
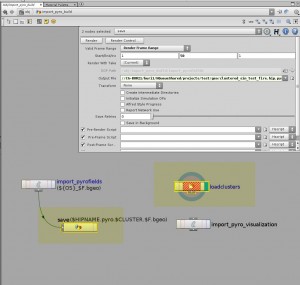
5. Specify the Job Name,HQueue Server name in the Hqueue Simulation Node, The below image shows the changes I made to the Hqueue Simulation Node. Target HFS and Target HIP are not compulsory.
6. These two nodes are also created by Distribute tool in Import Pyro Build Geometry Object
These are for Saving the Clustered Simulation and the Loading it back from the Shared Location.
That’s all for my first article.
Thanks for reading it.
See you again.
* DISCLAIMERS
USE OF THIS SITE IS AT YOUR SOLE RISK. THIS SITE AND ALL MATERIALS, INFORMATION, PRODUCTS, SOFTWARE, PROGRAMS, AND SERVICES ARE PROVIDED “AS IS,” “AS AVAILABLE” BASIS WITH NO WARRANTIES OR GUARANTEES WHATSOEVER. DIGITAL FRONTIER INC. EXPRESSLY DISCLAIMS TO THE FULLEST EXTENT PERMITTED BY LAW ALL EXPRESS, IMPLIED, STATUTORY, AND OTHER WARRANTIES, GUARANTEES, OR REPRESENTATIONS.
YOU UNDERSTAND AND AGREE THAT IF YOU DOWNLOAD OR OTHERWISE OBTAIN MATERIALS, INFORMATION, PRODUCTS, SOFTWARE, PROGRAMS, OR SERVICES, YOU DO SO AT YOUR OWN DISCRETION AND RISK AND THAT YOU WILL BE SOLELY RESPONSIBLE FOR ANY DAMAGES THAT MAY RESULT, INCLUDING LOSS OF DATA OR DAMAGE TO YOUR COMPUTER SYSTEM.

コメント
コメントフォーム